Adding Time Off Hours to Sage 100 Payroll 2.x Check Forms
How to Add Total, Accrued, Used, and Remaining Time Off Hours to Sage 100 Payroll 2.x Check Forms
Here are the steps to add Time Off 1, Time Off 2, and Time Off 3 to your payroll checks in Sage Payroll 2.x.
View this Sage 100 step by step software tip in a video format (10:22)
View this Sage 100 step by step software tip with individual screen shots below.
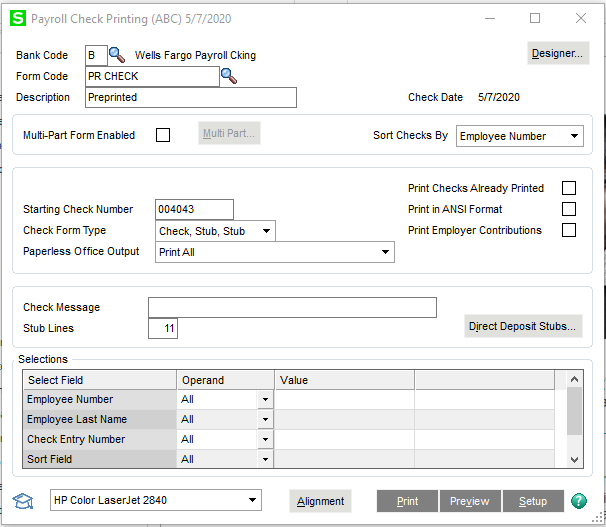
Enter time for at least three employees. This will give you some data to actually print on the form so you can see if it aligns correctly. Go to Payroll > Main > Check Printing. Create a new form code if you haven’t already done so. Do not modify the STANDARD form code. Click on Designer in the upper right-hand corner to open Crystal Reports.

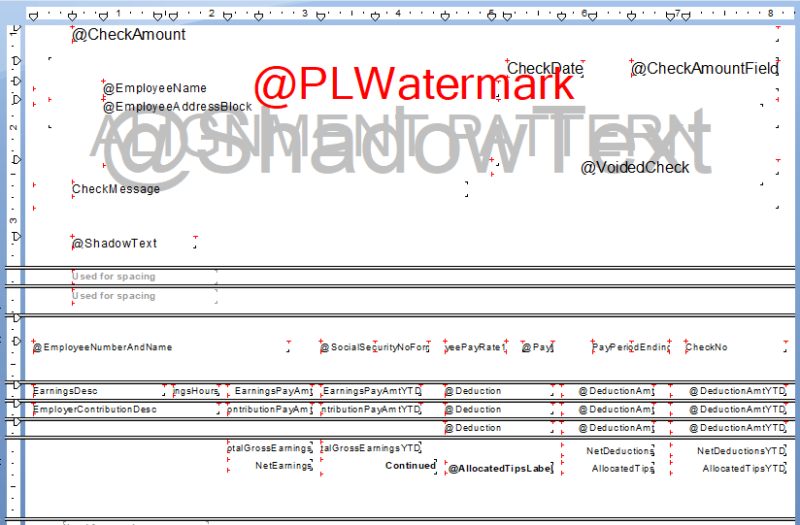
Grab the bottom of Group Footer #2a and drag it down to make the section bigger.
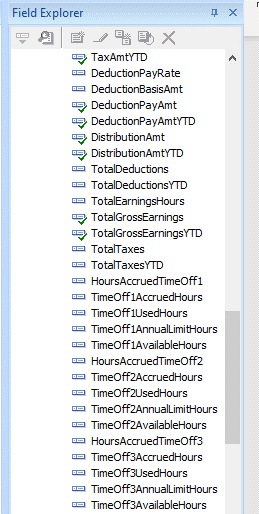
Go to the Field Explorer and expand the PR_CheckPrintingWrk file. Scroll down until you find the Time Off fields. These fields are user-defined in Payroll 2.X but are still identified as Time Off 1, Time Off 2, and Time Off 3 in the database.
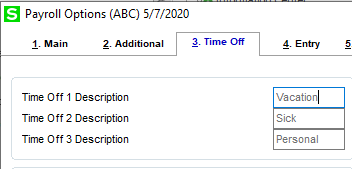
Highlight the field you want to add to your payroll check and drag it into Group Footer #2a. Insert a text object and type in a description for the field you just added. Repeat these steps for the other fields you want to add.
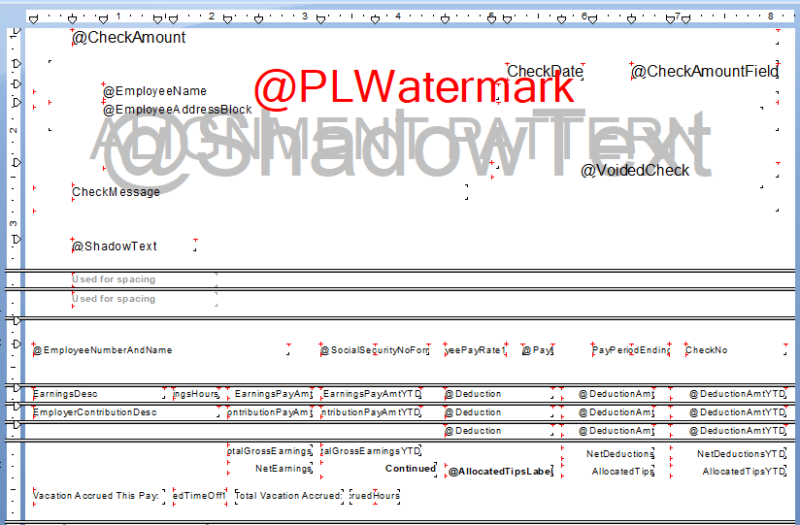
Exit Crystal Reports and save your changes.
You will need to modify the number of stub lines. Start by reducing it by 1 until you find the number that allows the whole check to print on one page. You have now added the time off information to your payroll checks. Don’t forget to clear your Payroll Data Entry if you entered test data.
For more information or assistance with your Sage 100 software, please contact our Sage 100 support team at 800.232.8913.
Register for our Sage 100 newsletter today!
Copyright 2022 DWD Technology Group | All rights reserved. This article content may not be reproduced (in whole or in part), displayed, modified or distributed without express permission from the copyright holder.
